How to make an (almost) no measure, one cut, easy to build raised vegetable bed
I spent yesterday making some new vegetable beds. Because Cleveland has some pretty erratic weather, I discovered very early on that growing vegetables in a slightly raised bed helps to keep my veggie plants alive, even if we get torrential rains or an extended drought.
Added bonuses are that raised beds heat the soil up a little faster so that you can plant sooner and the soil in a raised bed stays softer over the winter and you will be able to plant your cool weather crops with little or no tilling.
These beds are only a few inches high and are meant for raising the plants up out of the ground a bit. If you are looking for directions on how to make a waist high raised bed, stop back in a few weeks. I’ll be heading over to my grandfather’s house to see his waist high raised beds, which are ideal for seniors, anyone with back problems and wheelchair bound people.
So here we go.

Wander on over to your local hardware store. For one bed, you will need to get four landscape timers, one 2″X6″X8′ boards, eight 4″ lag bots and (optional) eight washers.
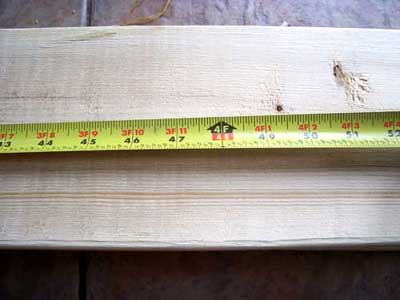
The 2″X6″X8′ board will need to be cut in half. This will be the only measurement you need to make. Measure 4 feet and mark that point.
Then cut the board in half.
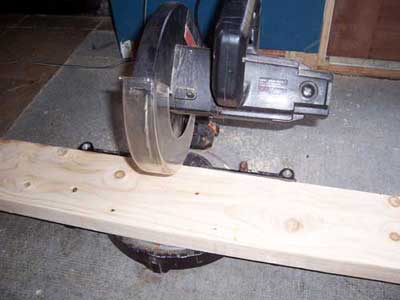
 Remember to check yourself anytime you are using any kind of power tool and wear your safety glasses. These are my husband’s. He likes to look cool when working with his toys.
If you do not feel comfortable using power tools to cut your board, most of the big box hardware stores can do this for you before you leave the store. Just ask and they will be happy to take care of it for you.
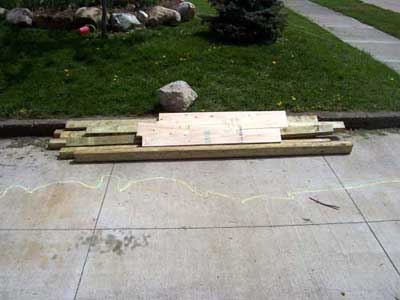 I will be building two vegetable beds today so I have the materials for two beds here.
I will be using my driveway to build my beds in. It’s an ideal place as it is outside, rather large, uncluttered and flat. I recommend using the driveway for building but any area you have that fits that general description will work.

You will need a power drill with a bit long enough that it will go through the 2X6 with at least another inch to spare. You will also need a ratchet with a ratchet head that fits snugly over the head of your lug bolts.
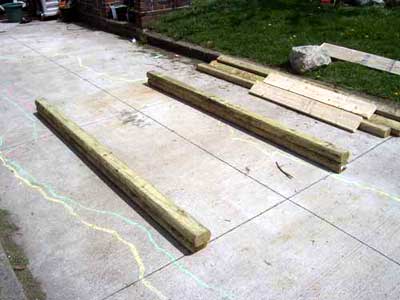
Stack two landscape timbers on top of each other and stack the other two about 4 feet away parallel to the first stack.
Use the cut boards to make sure that the distance between the two stacks is the correct distance and that the stacks are parallel.
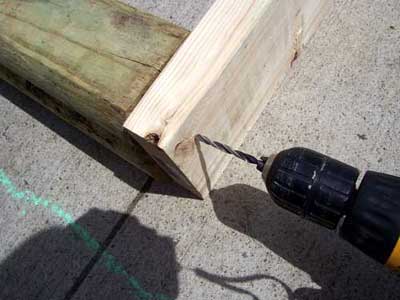
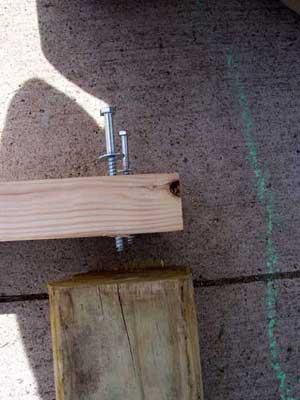
Holding the 2X6 against the stacked timbers, use the power drill to drill through the 2X6 into approximately the middle of each of the timbers.
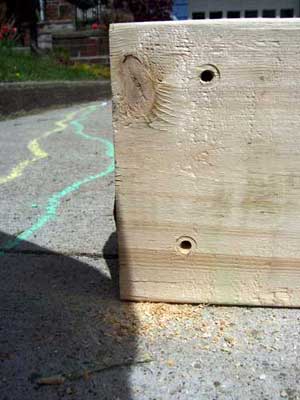
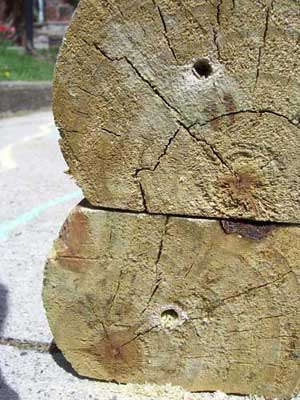
You will end up with two holes in the 2X6 and one in each of the timbers. The two holes do not need to be in a straight line so you don’t need to worry about making them square.
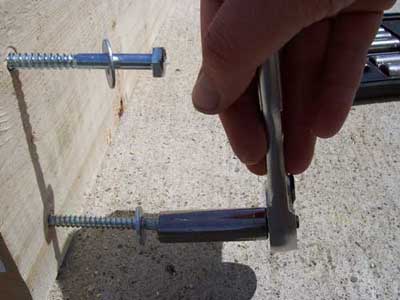
Next use the ratchet to insert the lag bolts (with optional washers) into the holes on the 2X6.
Insert both the lag bolts until you see their tips just appear on the other side. Use the tips to line up the holes in the board with the holes in the timbers.

Once the tips are in the holes on the timbers, continue ratcheting the lag bolts until they are fully screwed into the wood.
 If you have the luxury of a ratchet adaptor for your drill, this process goes very fast. If not, I suggest you find a nearby 4-6 year old and ask them if they would like to pretend to be Bob the Builder or Wendy (depending on the sex of the child). You have a 90% chance of them saying yes. Set them up with the ratchet and yell “Can we fix it? Yes, we can!” Then sit back and enjoy a frosty beverage while the child ratchets the lag bolts in for you.
Once the lag bolts are in, repeat this process on the other three corners. The last corner, you can skip the lining up of the holes as by this time the timbers will be pretty firmly in place and won’t move after you drill the holes.
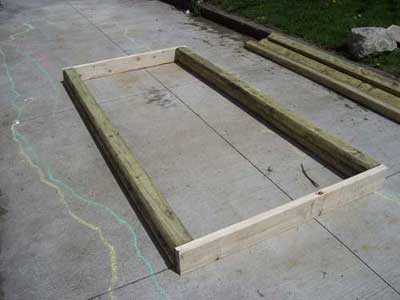
 This is what the finished product looks like.
And then you are done. The bed can be carried to the location of your choice and filled with dirt.
A few notes. Landscape timbers are pressure treated wood. By this time, all pressure treated wood sold in the US no longer contains the arsenic preservatives that caused concern a few years ago. But, if using pressure treated wood for vegetable beds still concerns you, you have two options if you still would like to use these plans.
One option is to pick up a plastic tarp in the paint department and use it to line the landscape timbers so that they do not come in contact with the soil in and around the bed (do not line the bottom of the bed with the plastic though).
The other option is to use three 2X4s instead of two landscape timbers. You will need to adjust the number of lag bolts and holes accordingly.
Did you ever do that article on the waist-high raised bed?
About how much did you end up spending on the wood materials for this bed? Nice pictures btw.
Thank the good Lord above…….someone like you, who loves to help others “get-it-right” is a blessing directly from heaven. Thanks for such a great site ! Carol
Hey Carol–nice page, and really appreciate the raised vegetable bed idea–my wife and I were just talking about doing something like that–voila!! Here, on the central coast of California–literally half way between LA & SF–we are enjoying Indian Summer–80 on the coast and clear as a daydream…California!!
Just stumbled across this site, but what a treasure! I’m mid 50’s (sigh) and not so nimble these days, but love the peace that comes from tending a garden. We sold our home about six months ago, and downsized to a rental. Our landlord is generous in what he allows, and I so wanted to make some “beds” without spending a fortune. I may use the above technique to do some beds along the duplex, but I can’t wait to see your raised beds. Your instructions are fantastic, and the photos icing on an already beautiful cake! Please keep us updated! Many thanks – TJ
This is true of both the biological and well as the much bally-hoed cognitive and cognitive behavioral revolutions. ,